The Moda String Along is officially under way. It's a New Year, so a fresh project is called for, don't you agree? I had a project in mind and made a few test blocks last week when I had a bit of down time. The idea is, you use scraps (or not) and make some sort of string quilt project. You can use paper or fabric as a foundation for your blocks, or perhaps use nothing at all. The point is to do your own thing. There are plenty of tutorials out there to Google if this method is new to you or you would like to explore alternate methods of construction. If you use Instagram, check out #modastringalong for lots of ideas for projects.
Here's what I am doing. Grab a cup of tea and settle in, this is a photo heavy post.
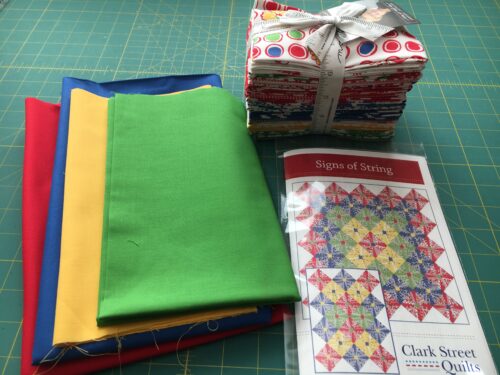
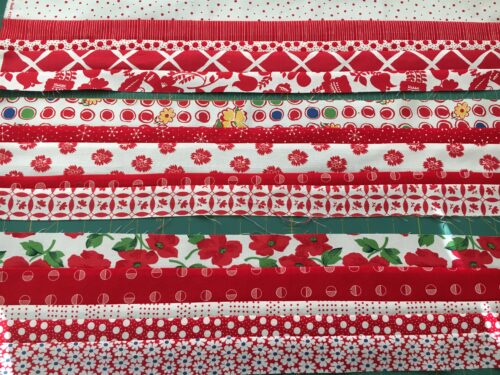
Of course I didn't use scraps. Why would I ever do anything so practical? I saw the perfect string quilt pattern (also called "String Along") and bought it as well as all the supplies needed for the project. I am using a couple of fat eighth bundles by Linzee McCray as well as some additional fabrics. It takes a lot of fabric to make a string quilt, and there is a lot of waste, in my opinion. That's why so many people use leftover scraps for their string quilts.
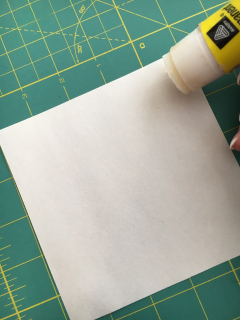
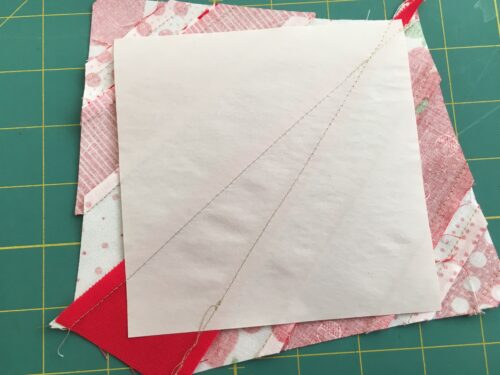
I am using foundation paper by Carol Doak. I cut squares to 5" for my pattern. Then I glued a rectangular solid color wedge to the paper. Just a dab on two corners of the paper with a regular glue stick works fine.
You want to make sure the corners of the paper are completely covered with fabric.
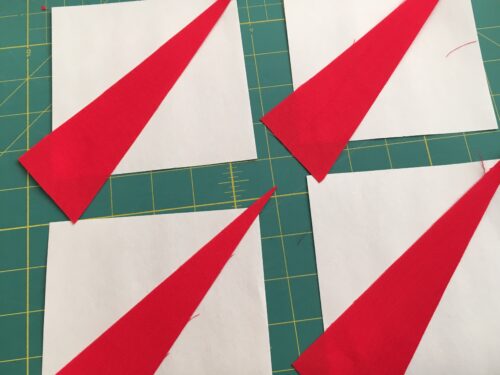
Next up for my project, is to make lots of strip sets. Mine are between 4 1/2" and 5 1/2". The width isn't real important, the sets just need to be at least 4 1/2" for what I am doing.
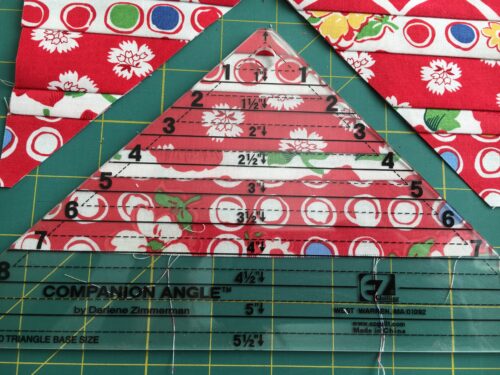
My pattern instructions call for cutting the strip sets down into 90 degree triangle wedges. The ruler I am using is called The Companion Angle by Diane Zimmerman. It is a great ruler with clear markings which are easy to see and line up. I get four wedges out of a strip set.
Sew a strip set triangle to one side of the center wedge, flip and press. Sew the second strip set triangle to the other side of the wedge, flip and press.
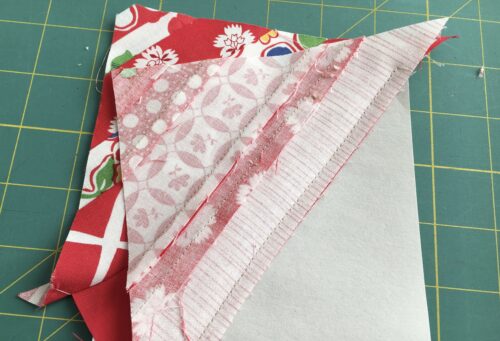
Now what?, you say. This does not look like anything useable. Well, here's where the foundation paper comes in. Flip that unit over.
Oooohhhh. Right. Don't even think of tearing off that paper yet. (Ask me how I know this…)
With the block unit upside down, trim the excess fabric from around the paper, using the paper as your pattern guide. Now you have a perfectly square block unit.
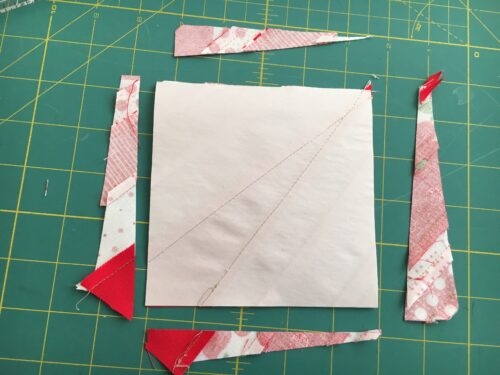
NOW tear off the paper. This came off very easily.
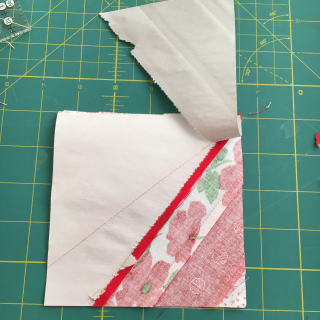
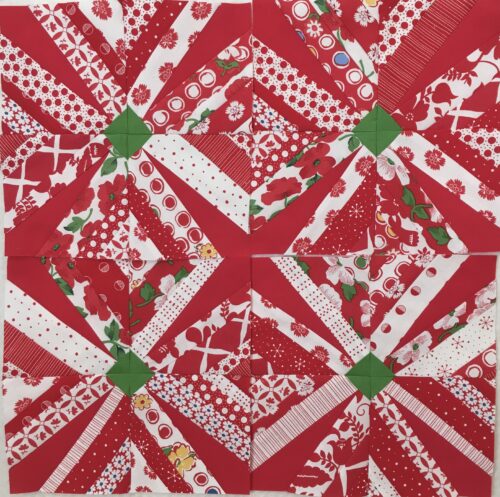
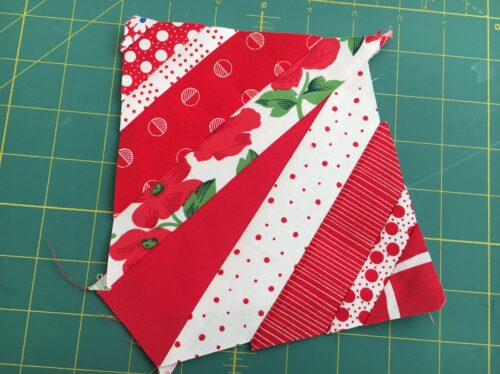
Four of these units make a block for my project.
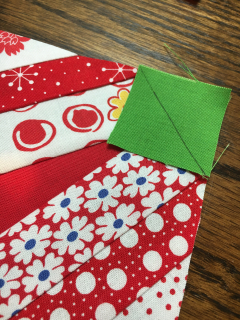
Before sewing them together, I attached a fold and flip square to the pointy corner of the wedge. It forms a center square in the block when the four units are sewn together.
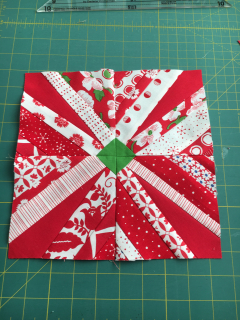
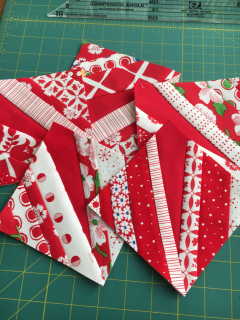
And there you go. I have to make 17 of these red blocks, then some blue blocks, green blocks and yellow blocks! They are addicting once you get the first few done and are familiar with the method.
Looking forward to lots of sewing in the next week. Happy New Year everyone!

12 Responses
Happy New Year to you too Nicole! One of my resolutions is to finish undone projects in the quilt room. make a new to do list is on my agenda today. I did get yet another baby quilt finished, labeled and ready to mail yesterday? YOur string quilt is very bright and pretty. Have a wonderful eve and day!
Mary
Wizard!! Thanks for the tutorial and have fun making these addicting bocks!
Happy New Year, too!!
Hugs!
Looks great, Nicole. Happy New Year to you. I am off on a quick trip to a quilt shop to buy some fabric for a dirty laundry bag that I want to make before we head off on our cruise in February. I’ve only had this pattern for ten year….or maybe more! lol.
Super cute! I’ve been gathering strings and ideas too
Great tutorial,thanks. Another thank you for your book review,I signed out of the library “Last Christmas in Paris, it’s fantastic.
Cute block and I’m so tempted to string along but first I need to finish some other things. Perhaps I’ll make something small?
Happy New Year to you!
I can hear muffled shouting from my scrap drawer(s)…pretty sure they want to come out to string along! We’ll see how that goes! Wishing you a very happy & healthy 2019!
SOLIDS??? I think this is the first time I’ve seen you go modern with a bright solid. It looks wonderful!
Happy New Year! Hope you had a lovely visit with your son.
xo
You make it look so easy! I was wondering how hard it was to line up the squares in the center, but you make it seem like a piece of cake! Happy New Year to you!
Wow! Your block is amazing! So creative!
Happy New Year! Your blocks are fabulous. I want to try this method (my organizing plans for the day are slipping away as I look at your blocks, I want to try this method). Thank you for sharing.
That is a really neat string block. Thanks for sharing how you’re doing it.