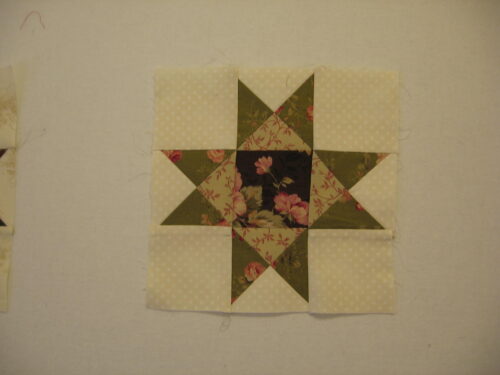
Our Eventide quilts require 42 Ohio Star blocks, and in each Ohio Star block, there are four "Hour Glass" units. I have a couple of tips to share with you that might help make your hour glass units turn out nice and sharp.
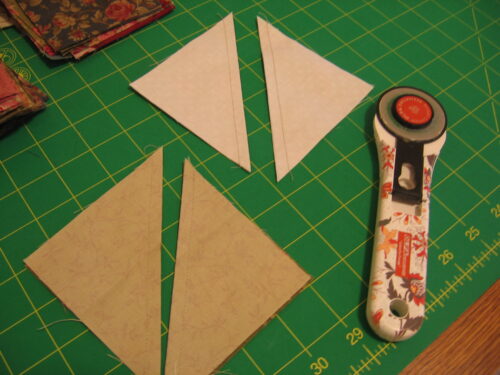
Each hour glass unit is comprised of three fabrics: two dark squares, one light square, and one "something else" square. Four squares total. The "something else" fabric can be just about anything you choose, it just needs to stand out from the other two fabrics and your center square.
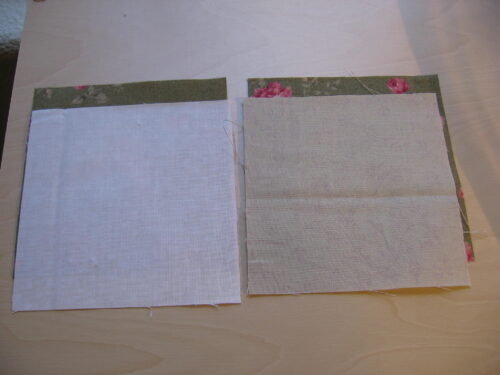
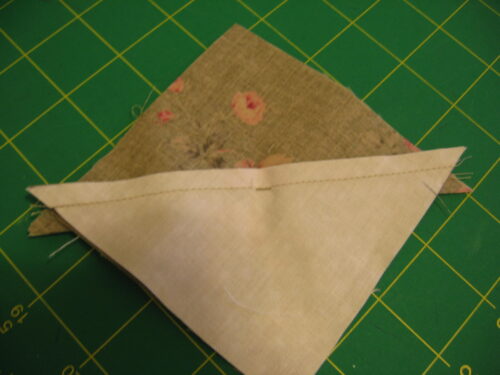
Take your two dark fabrics and lay them right side up. Place your light fabric right side down on top of one of the dark squares. Place the "something else" fabric right side down on the other one.
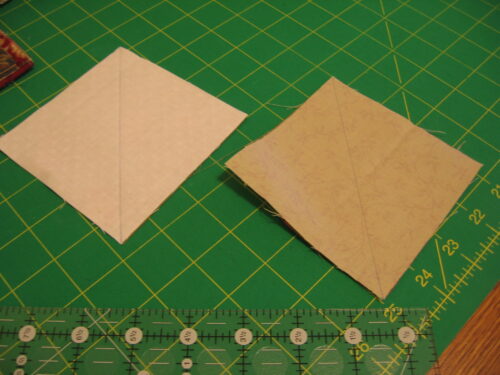
Draw a line diagonally through the center of each of the two fabric combos.
Stitch on either side of your drawn line. You've done this a million times when making half square triangles.
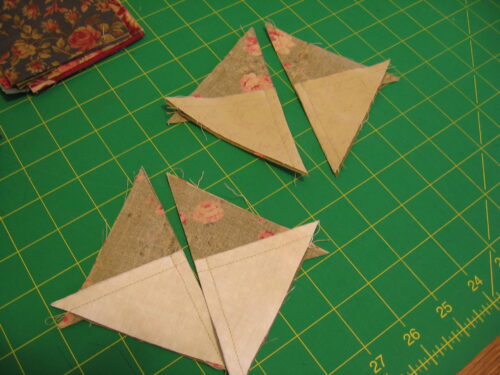
Cut those squares in half along the drawn line.
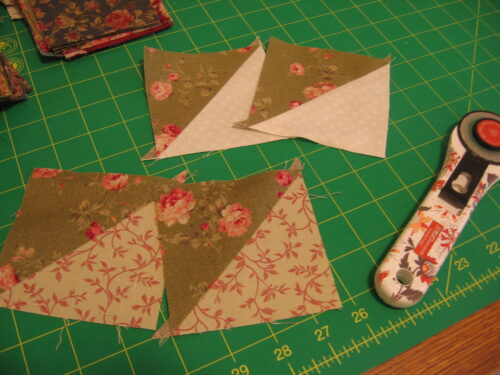
Press open, towards the dark fabric. You now have four half square triangles, two with a dark/light combo and two with a dark/"something else" combo.
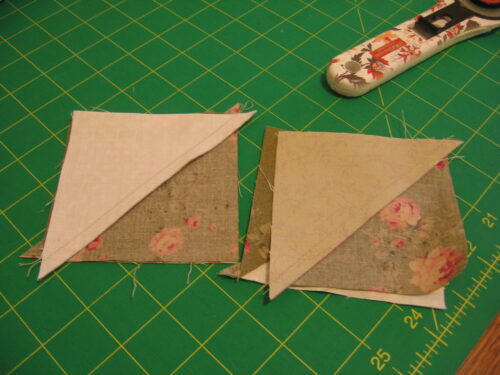
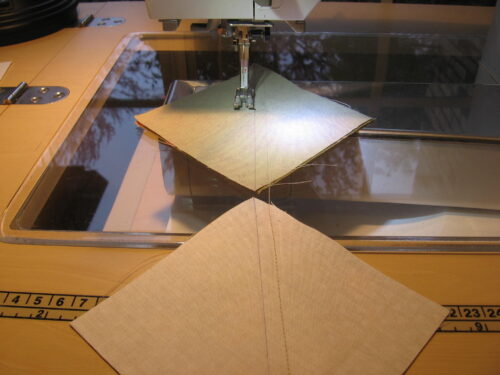
Combine a dark/light half square triangle with a dark/"something else" half square triangle. Place right sides together. You will have two of these sets.
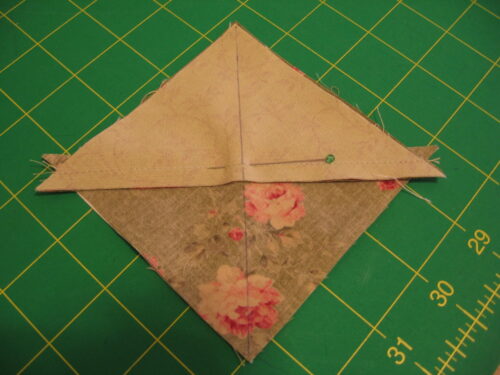
Draw a line diagonally through the center of each top unit, and place a pin at the place where the seams abut. Wiggle the fabrics together a bit, and you will feel with your fingers just how the seams meet up against each other. Check your pin placement on the back side just to be sure you got it right.
Trust me, this is important. If this seam doesn't line up right, your hour glass unit is going to be "off" and look funny and bother you throughout the rest of time.
Again, sew on either side of your drawn line, then cut apart on the drawn line.
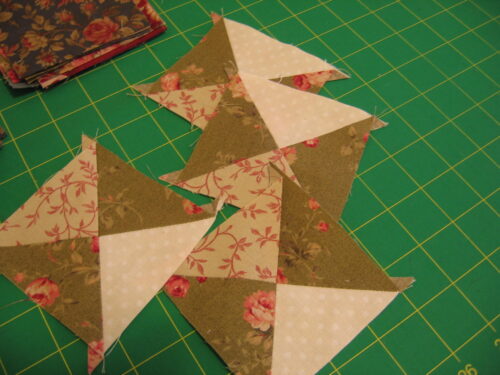
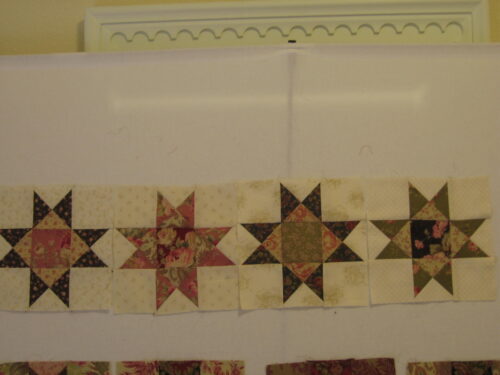
Ta Da! Like magic, you have four perfect little hour glass units. See how the points all come together perfectly sharp at the center? That is what that little pinning step achieves for you. Do not skip it.
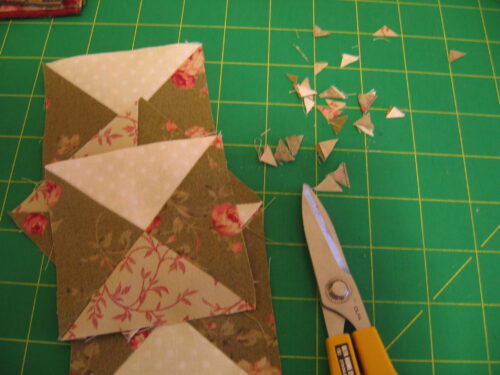
Trim off your little dog ears. (I really dislike that term, are those bits ever called anything else?)
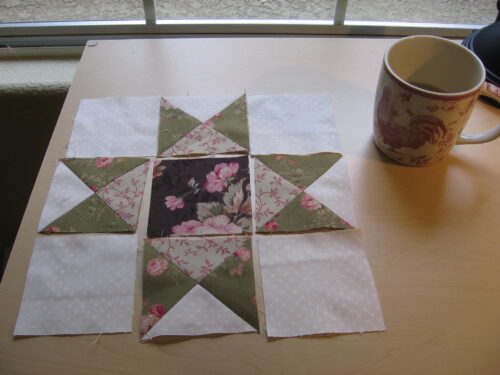
Lay out the other components of the Ohio Star block, and get ready to sew them together. You will need the four hour glass units you just made, four light corner squares and a center square. Now we are basically just sewing a simple Nine Patch together. I sew my block together in three horizontal rows, top, middle and bottom.
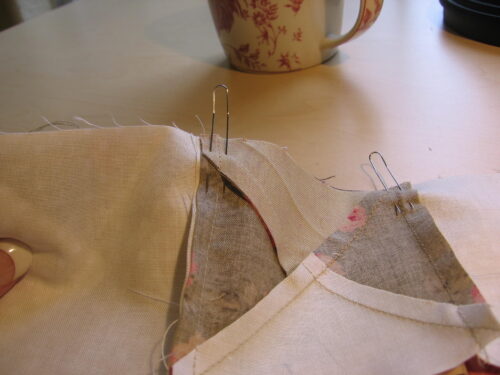
When I connect my three block rows together, I like to use U shaped pins to keep my seams lined up. Pinning is good. Sew your rows together and your block is done.
Now, just do this 41 more times, and you will be good to go. lol Seriously, it's fun.

19 Responses
Great tutorial.
I love your double pins. Where did you get them. I pin Pin Pin, and these look like they could save me some time. Thanks for the update. Things are moving along in la Casa Nicole!
It’s looking good! Once again, your breaking the block into bite-size pieces makes it all seem so simple. I have those U-shaped pins, but haven’t used them much. I’ll have to get them out again.
Looks great. I call those little points “little points”..how inventive eh? Love your blog!
Yep! That’s my tried and true method for half square blocks and hour-glass blocks. You cannot beat it for accuracy and for ending up with 4 hour-glass blocks!!
I call the “dog ears” giblets. It somehow seems kinder.
The U shape pins are new to me and I can see I need some.
As usual, you are speed sewing your way through Eventide! Applause! Love your fabrics!
Hugs!
Thanks for the great tutorial, Nicole. I can’t wait to try it.
Beautiful blocks, Nicole. I love the ones with the dark floral centers. Great fabric choices!
“Dog ears’ are not only a stupid name but I also hate having to snip them–just a bother, but a necessary one, for sure!!! The U shape pins are new to me and I’m going to buy some a.s.a.p.!! Genius! Thanks for the great tips! Your colors are terrific, as always, and it’s gonna’ be a beauty!
OH MY GOSH! SIMPLY BEAUTIFUL BLOCKS!
I’ve never heard of U pins. Have to look these up. Thanks Nicole!
Your Eventide is going to be gorgeous. Love the fabrics!
Great tutorial with some very helpful tips. Love your rooster mug in the background LOL.
I can’t wait to get started on my Eventide – but I am going to go out and get me some of those U shaped pins. For someone like me who does almost every Miss Rosie pattern, they could come in very handy!
Thanks for the tips.
Marsha
Thank you for this lesson and for answering my question on “something else” – it all makes sense now and I put together my first block last night. Think I’m going to love this quilt, but mine is going to be much darker than Carrie’s sample. Love the U shaped pins, need to find some of those!
Thanks for the tutorial. I just started cutting all the fabrics.
Thank you for the great tutorial. I have long been wondering if there was a better way to make these blocks.
It all sounds so easy when you do it Nicole but when I get A bit of spare Time I will try It thanks For the tutorial.
Hugs Mary.
thanks Nicole, I have been pinning but I forgot about my little fork pins. Its that “41 more times” part that gets me…
🙂
Nicole,
Thanks for the tutorial. Your quilt is going to be beautiful! You and Thelma amaze me with how quickly you sew!
I have never seen the fork pins. Those would be so helpful. I will have to look for them!
Hugs,
Donna
Love your fabrics Nicole. You definitely have an eye for color!!
I’m not pining in the proper place on my final hour glass run through the machine, guess that explains why sometimes they are perfect and sometimes off just a tad… I always make sure the seams abut, but then pin in that general vicinity, not right on that line. Lesson Learned for me, THANKS.
Great Tutorial