 Lisa Bongean's Thread Catcher
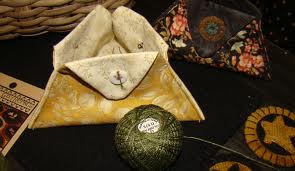
This is Lisa Bongean's triangular thread catcher. If you don't recognize her name, Lisa is the force behind Primitive Gatherings, one of the best quilt shops in the country. She also has a blog, so be sure to check it out.
So, last week, I was blog hopping around, and saw that Paulette of Sweet P Quilting and Creations had made one of these little things, and I thought it was adorable. In my mind, I was thinking "what a great gift this would make". Everyone needs a little container to hold their snipped threads so they don't end up as dust bunnies on the floor. This takes up no space on your sewing table, and folds flat as a pancake if you want to keep it in your On The Go sewing kit.
I started googling around to see if I could find a tutorial on how to make these, and stumbled upon Lisa's. If you click on this link, you can download the pdf instructions for yourself! Paulette used the instructions found on Needling Things to make hers.
All you need to get started is a couple of layer cake squares (or two ten inch squares of coordinating fabrics), some fusible interfacing (I used Pellon), and three cute buttons. Here is a photo journey of my experience in making one.
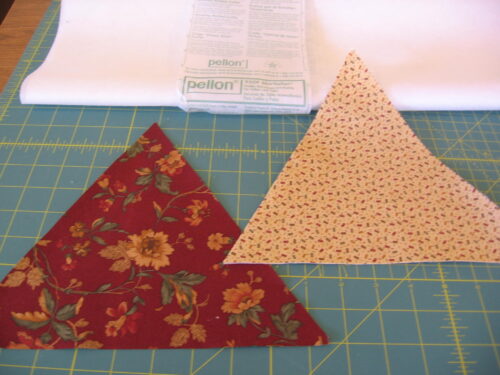
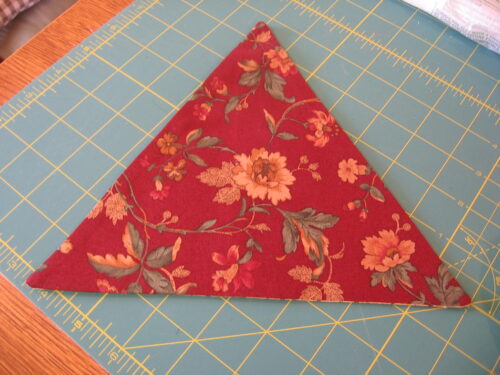
I printed out the instructions from Lisa's pdf, which includes a pattern for the triangles. The fabric I used was two layer cake squares of a recent Kansas Troubles collection. Lisa's version has rounded corners. I chose to make mine pointy.
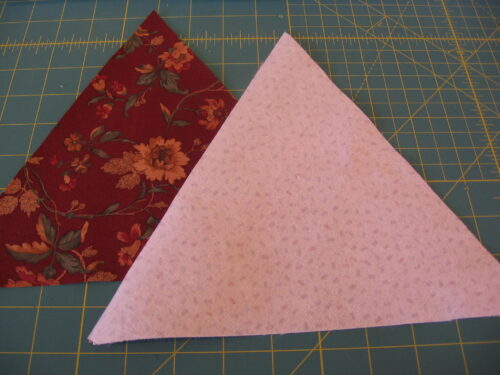
Ironed on my fusible interfacing.
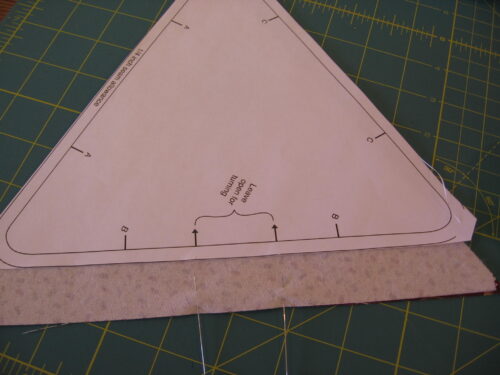
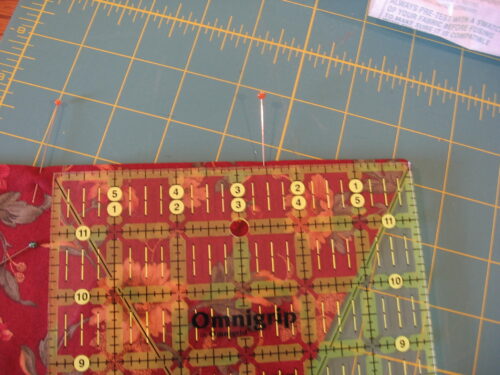
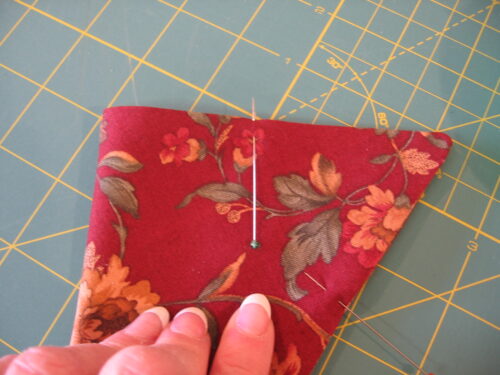
Make a little sandwich with the two triangles RIGHT sides together. Use the pattern to mark with pins the places for stitching and not stitching.
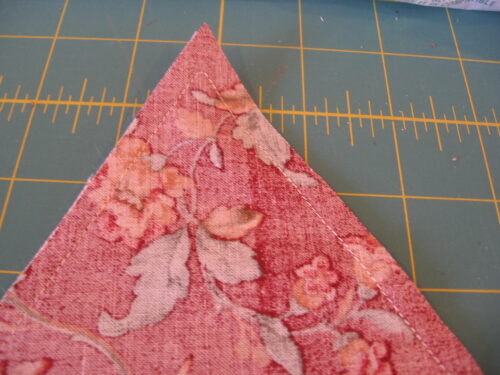
Sew around the triangle sandwich, leaving a space between your pins to turn it inside out.
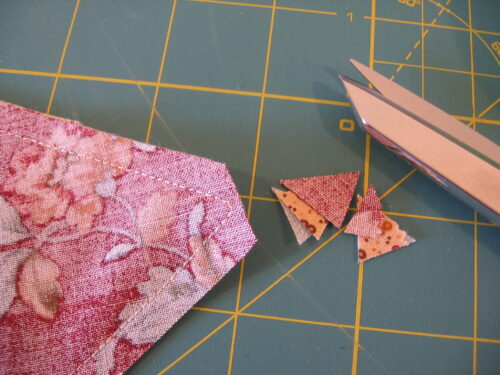
Snip off the little points at the triangle tips. Turn piece inside out, poke out the triangle tips so they are sharp, and press.
Nice. You could top stitch all around the triangle at this point, which I think I will do next time.
Mark in 2 1/2" from each triangle tip and mark with a pin.
Fold the piece over, and pin two opposing ends of the triangle together at that 2 1/2" mark. You are going to stitch from the fold on the left to the pin.
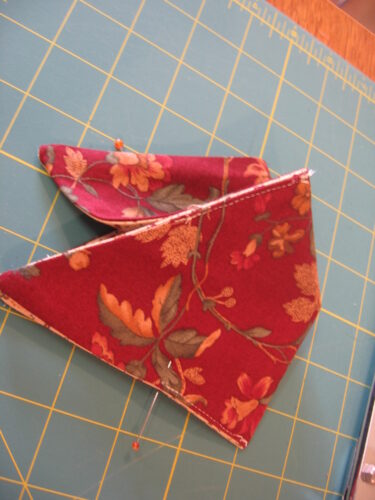
Do this on all three sides of the triangle. In the photo below, I have done two of the three sides, and the third is pinned, ready to be stitched. I used a light colored thread so you could see it. In real life, I would try to match the outside fabric so the stitching would be less obvious.

Here's my last side to be stitched.
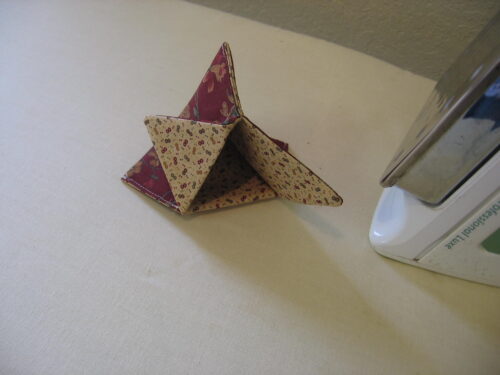
Woohoo, almost done. In the photo above, I am pressing down the triangle points, but I am not sure it is strictly necessary.
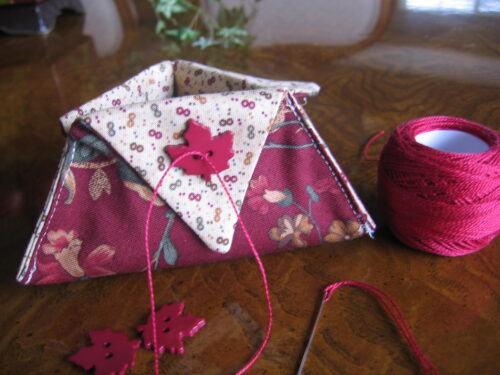
I used perle cotton thread to attach these cute little "findings" to each side, for the purpose of decoration as well as securing the triangle flaps down. Just stick the needle down and up again and tie a knot to secure. It's ok if the little snipped tie ends show. In my photos the opening looks small, but trust me, it is plenty big enough for dropping your little threads and fabric snips into.

Can't you just see making a gazillion of these for all the girls in your sewing group, or for goodies to give out at a retreat?
Oh, and they fold flat too, for travelling:
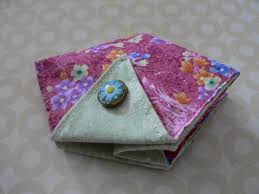 Photo from Needling Things
Check out the tutorial at Needling Things as well. I see she topstitched her edges for a nice finished look. Next time…
Thank you so much to Paulette who showed this on her blog and gave me the idea to look for a pattern!

21 Responses
Nicole, Paulette of Sweet P Quilting and Creations showed the catcher on her blog on January 30th. Yours are sweet in the Kansas Troubles fabric and love the buttons.
Annie O @ Annie’s Quilt Forts gifted me one last week. That might be where you saw it. I love mine and use it every time I sew. It’s perfect!
Darn spell checker!! That should be Orts not forts
Great idea. Thanks for the tutorial. I hope to make one or two of these!
Yup…I blogged about it BUT YOU did it!! Talk is cheap…the proof is in the pudding!! Gorgeous job…and thanks for the inspiration to get off my keester!! haha
How cool and cute is this little thread catcher?! Thanks for the pictorial tutorial and the links. Think I’ll make at least one today!
Question: under tutorial photo 3, should that read “RIGHT sides together”?
Thanks again!
Hugs!
I saw one last week on Sweet P Quilting and Creations. Thanks for the great step by step.
thank you for sharing this Nicole !! . . . I love it !! . . . I’m going to make one as soon as I get home from work today !!
I love that! I have something similar but this is actually cute! I think I need one. Thanks for the info, the pictures and the link!
Thanks Nicole, guess what I’ll be making today!!!
Really cute! And yes, they would make a terrific gift for all the ladies in a sewing group.
What a great idea for my Guild secret sister! This is our first month for giving and I’ve been trying to come up with a cute, fun gift-y idea! Thanks for posting the pictorial to make it easy!
Your version is adorable! I just made three of these recently and you are right, they take very little time. I spent more time picking out just the right vintage buttons than actually sewing!
Thanks, Nicole, for this thread catcher pattern link and tutuorial. I’m going to get busy making a few. And that tie off tutorial is excellent; I’ll be referring back to that.
Poor Eva! I remember how I use to have those appointments when our son was a baby!
I’ve told you before that I love your blog — every aspect of it!
These are so cool, Nicole! I’m going to hurry up and make one for me and several for gifts! Thanks so much!
Cheers!
Wow, love this tread catcher. I can see that I’m going to have to make some:) Thanks for the links and tutorial on what you did:)
LauraT
Thanks for sharing the thread catcher. You’re right they will make great gifts.
Great minds think alike! I also saw that on the blog the other day, and decided to make some for my February Christmas projects. I had saved the pattern, so it’s printed and ready to go this weekend. Thanks for the second dose of inspiration!
These would be great little gifties for a retreat. I think I will be making up a lot of these little guys!
Thank you so much!!! This looks like fun and a great gift too! :o) Sure do appreciate all your tutorials on your blog! I’ve learned SO much from you! Hugs! Bari
Hi! I came across your blog by a happy accident. Thank you so much for sharing your thread catcher tutorial. I am a beginner sewer and this came out so cute! I am planning on stitching several for my stitcher friends! Have a great day. Beth